Friday, April 30, 2021

Baked Goods and Experiments

 April 28th - 30th 2021

One of my recent purchases was a bread tower. Or that is how it was advertised anyway. I found it on a nice Etsy shop and the dimensions seemed ok for putting it somewhere in the Tea Room/Orangery/Limonaia.  It came with some small wooden trays that would slide in and out of the slots. The top is open, so I figure I will end up closing it off and making a top shelf for bags or something but for now, I only made a few changes.
Part of the tower’s exposed wood had been laminated and part of it not.  So I rectified that and added some of my own (of course from left over pieces of my other projects) and then stained the remaining exposed areas. Looks a lot better to me. I also aged the trays as they were too new looking. I imagine that in a setting with lots of bread and hands constantly pulling the trays out they’d be beat up a bit. (I soaked a bunch of wicker baskets while aging the trays making them darker and pulling out the useless handles. I’ll use them for bread and other sundries.) I then “made” some paper to line the trays and pulled out my stash of miniature breads that I have been buying over the last few years. 

The original state of the tower. You can see my piece of laminate to the right.

I just needed to add laminate to some sides.

Looks much better.

Shelves painted now too.
Staining the trays and darkening baskets.

Crimping paper so it will be soft and fit in the trays.
The same shop that sold the tower also had some baguette and a little shokupan type loaf. I bought both but when they arrived I wasn’t 100% pleased. The baguettes are bowed and much too light colored for my taste. So fixed them up a bit. The little loaf was not the best either - you could see the seam where the loaf was made in a mold. I have no issues with molds but at the very least they could clean up and trim off the seam lines.  So I made it into a little whole wheat loaf and sprinkled some “flour” on the top of it. Looks better. I also added a little flour (actually scraped chalk) on the large whole wheat loaf I bought (different shop and better quality). Once I fixed up all the bread products and added them into the trays I was pleased with the final result.  Now I just have to make a bunch more bread bags.

New and improved tower.

New and improved bread.

And better baguettes.

Template for making bread bags.

I also stained the cheese board. I scratched it up with knife marks too since I imagine it would have them being a cutting board and all. Looks much better.

Cheese board

I finished painting the two window panes for the door panel. They look fine and of course, since I didn’t put much paint on the sides they are not fitting snuggly.  I will probably have to glue these ones in - or just add more paint to the sides and refit them. More likely that.  So I started to look at the inside of the panels and thinking about how to decorate them. I already have an idea of the designs and “tiles” I want to use. But I thought that just printing them on photographic paper would be too flat and boring. So, I started screwing around with embossing powder.
The tile - powder and pastel chalk.

Mixed green chalk and resin.
The powder is sprinkled over wet ink and then “melted” with a heat gun creating a pseudo 3D effect. (Embossed effect.)  Thing is, the damn powders are expensive and I wasn’t even sure how to use them. So, after navigating the net for info I decided to mix the powder I have (white) with pastel chalk. I couldn’t find anywhere that suggested doing this but I figured it had to work. I experimented on the black & white pic to see if the powder would melt and stick.  The green was fine so I tried yellow.  But since I am not sure of the ratio, I was afraid to put too much chalk in and I ended up with a pale colors. No good. Still, I was able to use it on a color print out of the large lemon tile and I actually like it. I may want to make some areas in the designs in relief. Then I can varnish them thickly to simulate a tile like surface.  There is also the option of buying alcohol based inks and adding those into the white powder.  I may try and find some inks and see if that works too. Anyway, it’s fun finding a new process and experimenting.

Applying the powder to the brushed on ink.

After applying heat. You can see it's glossy.
Adding the yellow embossing to just part of the design.

And here is some more info on my favorite lemon the bizzaria. It is so damn ugly! I would like to taste it one day.


Monday, April 26, 2021

Painting and Door Knobs

April 21st - 26th 2021

I admit, my blog is more a story about trial and error.  I am not a miniature artist or builder with any experience - all I know is from what I try to accomplish and sometimes it works and sometimes doesn't. It's a hobby that presents challenges to me in finding the best and more effective way to create an object or a look that I have envisioned - but that really doesn't exist. This is why I enjoy it - but for you, maybe it's boring reading about my constant fails - dropping pieces, splinters, burns.... The dangers of "screwing around" with things I really have no business doing. Well, it's fun for me - and hope you enjoy my creative endeavours and I look forward to finishing this project! Hopefully it won't take as long as the Japanese Dollshouse did.....

Anyway, I finished painting the first panel white including the window panes. They were easily removed but to put them back in I had to sand down the sides a bit. Course they were quite loose coming out so I thought they’d fit snuggly going back in - but they were a bit too snug. So quick slight sanding did the trick. At least now I won’t have to glue them in place and I know that all the others I should just put a very light wash on the external frame to save time from sanding.  I hate painting - I think it’ll be easier if I just give them a slightly diluted paint job and a second hand rather than straight paint from the tube.

I decided to paint a door panel next.  The doors are pinned into the frame so I had to be sure that when I removed them (or even if I should) they’d go back in easily.  I have never done a build with a pin hinged door (the Ryokan dollhouse just had sliding doors) so after checking info on this kit it seemed ok to remove the bottom pin and slide the door out. Which I did, only to have the top pins fall out and onto the floor.  Ho-hum.  Boring. How many times have I dropped miniature parts on the floor which of course hasn’t been swept for weeks?  Anyway, I used my trusty dust pan and brush and found the missing pegs after about 10 minutes of cleaning/searching.  I pulled out the second door panel and took those out now since I will probably paint that panel next anyway.  I then removed the panes from the doors and carefully made sure I put each with its own door as they are also a snug fit.  I sanded down the areas where the tapes they used to stabilize pieces during shipping had left some gummy residue and put masking tape on the “window” panes since those are not removable.  I was then prepped for painting.
Masking off the windows for painting


First door done, second to finish.
After painting more, I had to clean the window pane since the dirt and grime had accumulated a bit there. I used some alcohol and cotton and a cotton swab to get it fairly clean. Course it’s impossible to get it perfectly clean.  I then checked the other door to find out which side was inside and outside (since the panes get installed on the outside) and managed to coax the window panels into place. Again, nice snug fit because of the small amount of paint on the inner part of the door frame. That done, I tackled the second door in the same manner and fit its pane as well.  Next up, door handle and embellishments.
Doors painted and trial fit.
I had seen a really nice antique door with kick panels on the bottom. I really like the idea that the Tea House would have some kind of bottom protection for the front door.  I mean, the idea is that people have always been coming in and out and banging up the doors with pots and plants etc. Then once it was refurbished, they just decided to leave the kick panels and give them a quick brushing.  I recently had our front door rejuvenated after 20+ years and so much wear due to weather that I noticed that the front brass door knob was pretty tarnished and sad looking.  The guy that did the work said no need for chemicals, you just give the door knob a good rubbing with steel wool.  He left us a nice size piece since the materials were already paid for in the renovations so I used that to burnish and blemish the panels. You can see the difference on the left where I rubbed the brass and let the black residue shed off onto the door. I did the right side one to match them up a bit.

Cutting the lamina, again.

Gluing the door kicks into place.

Burnished areas and dirt added on the left.
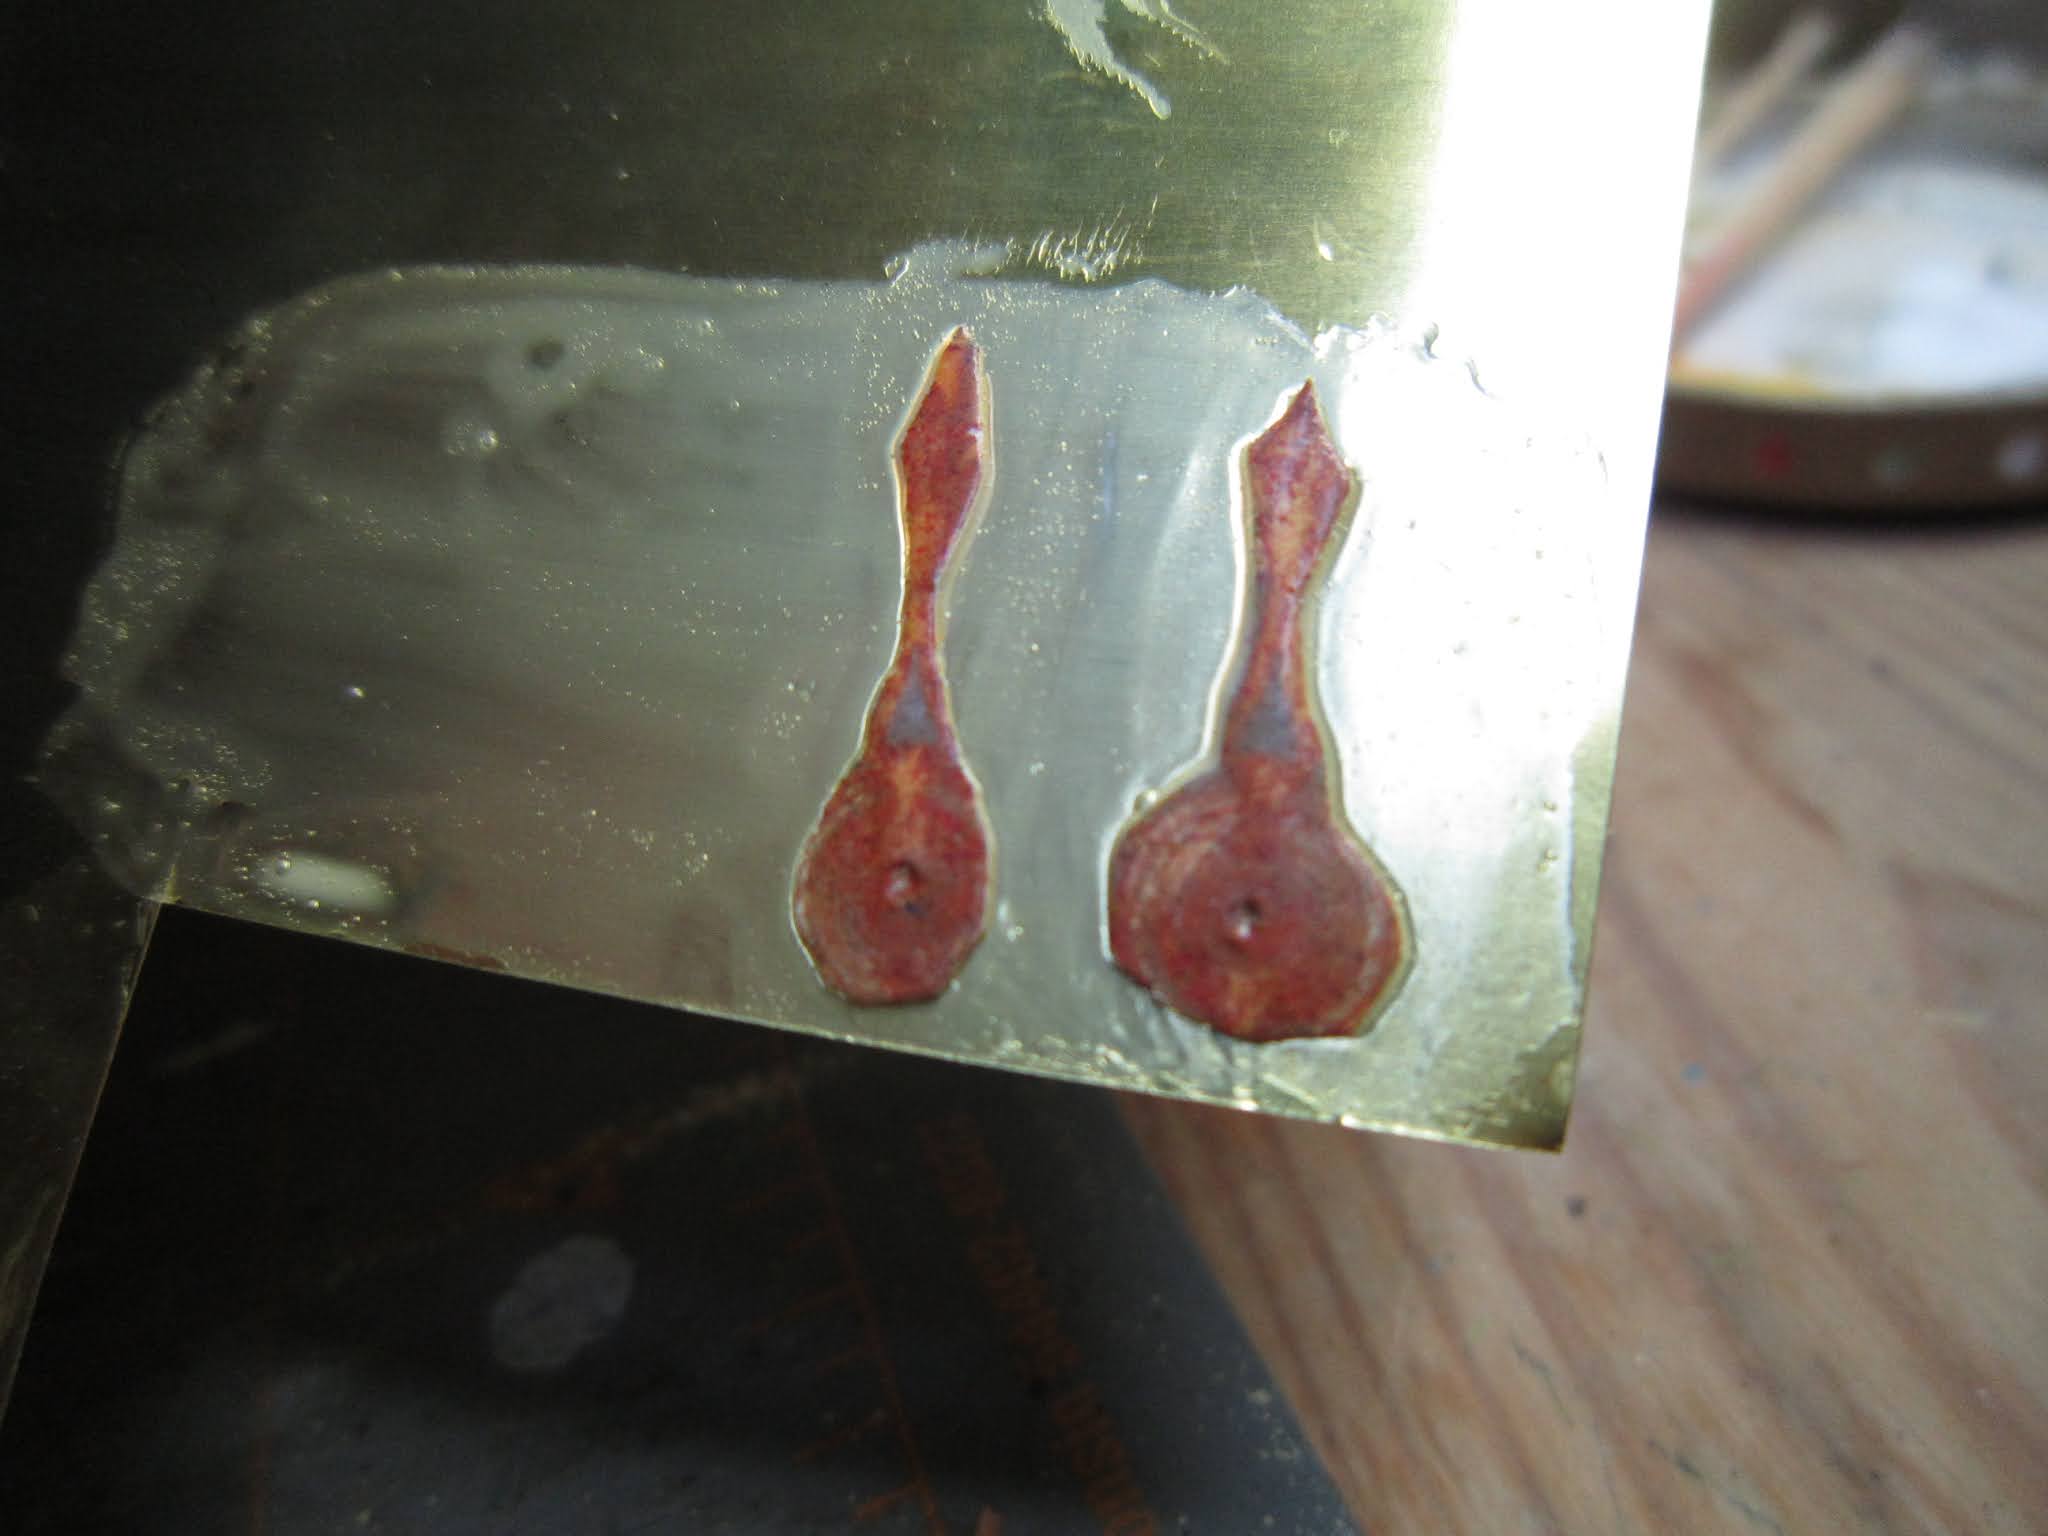
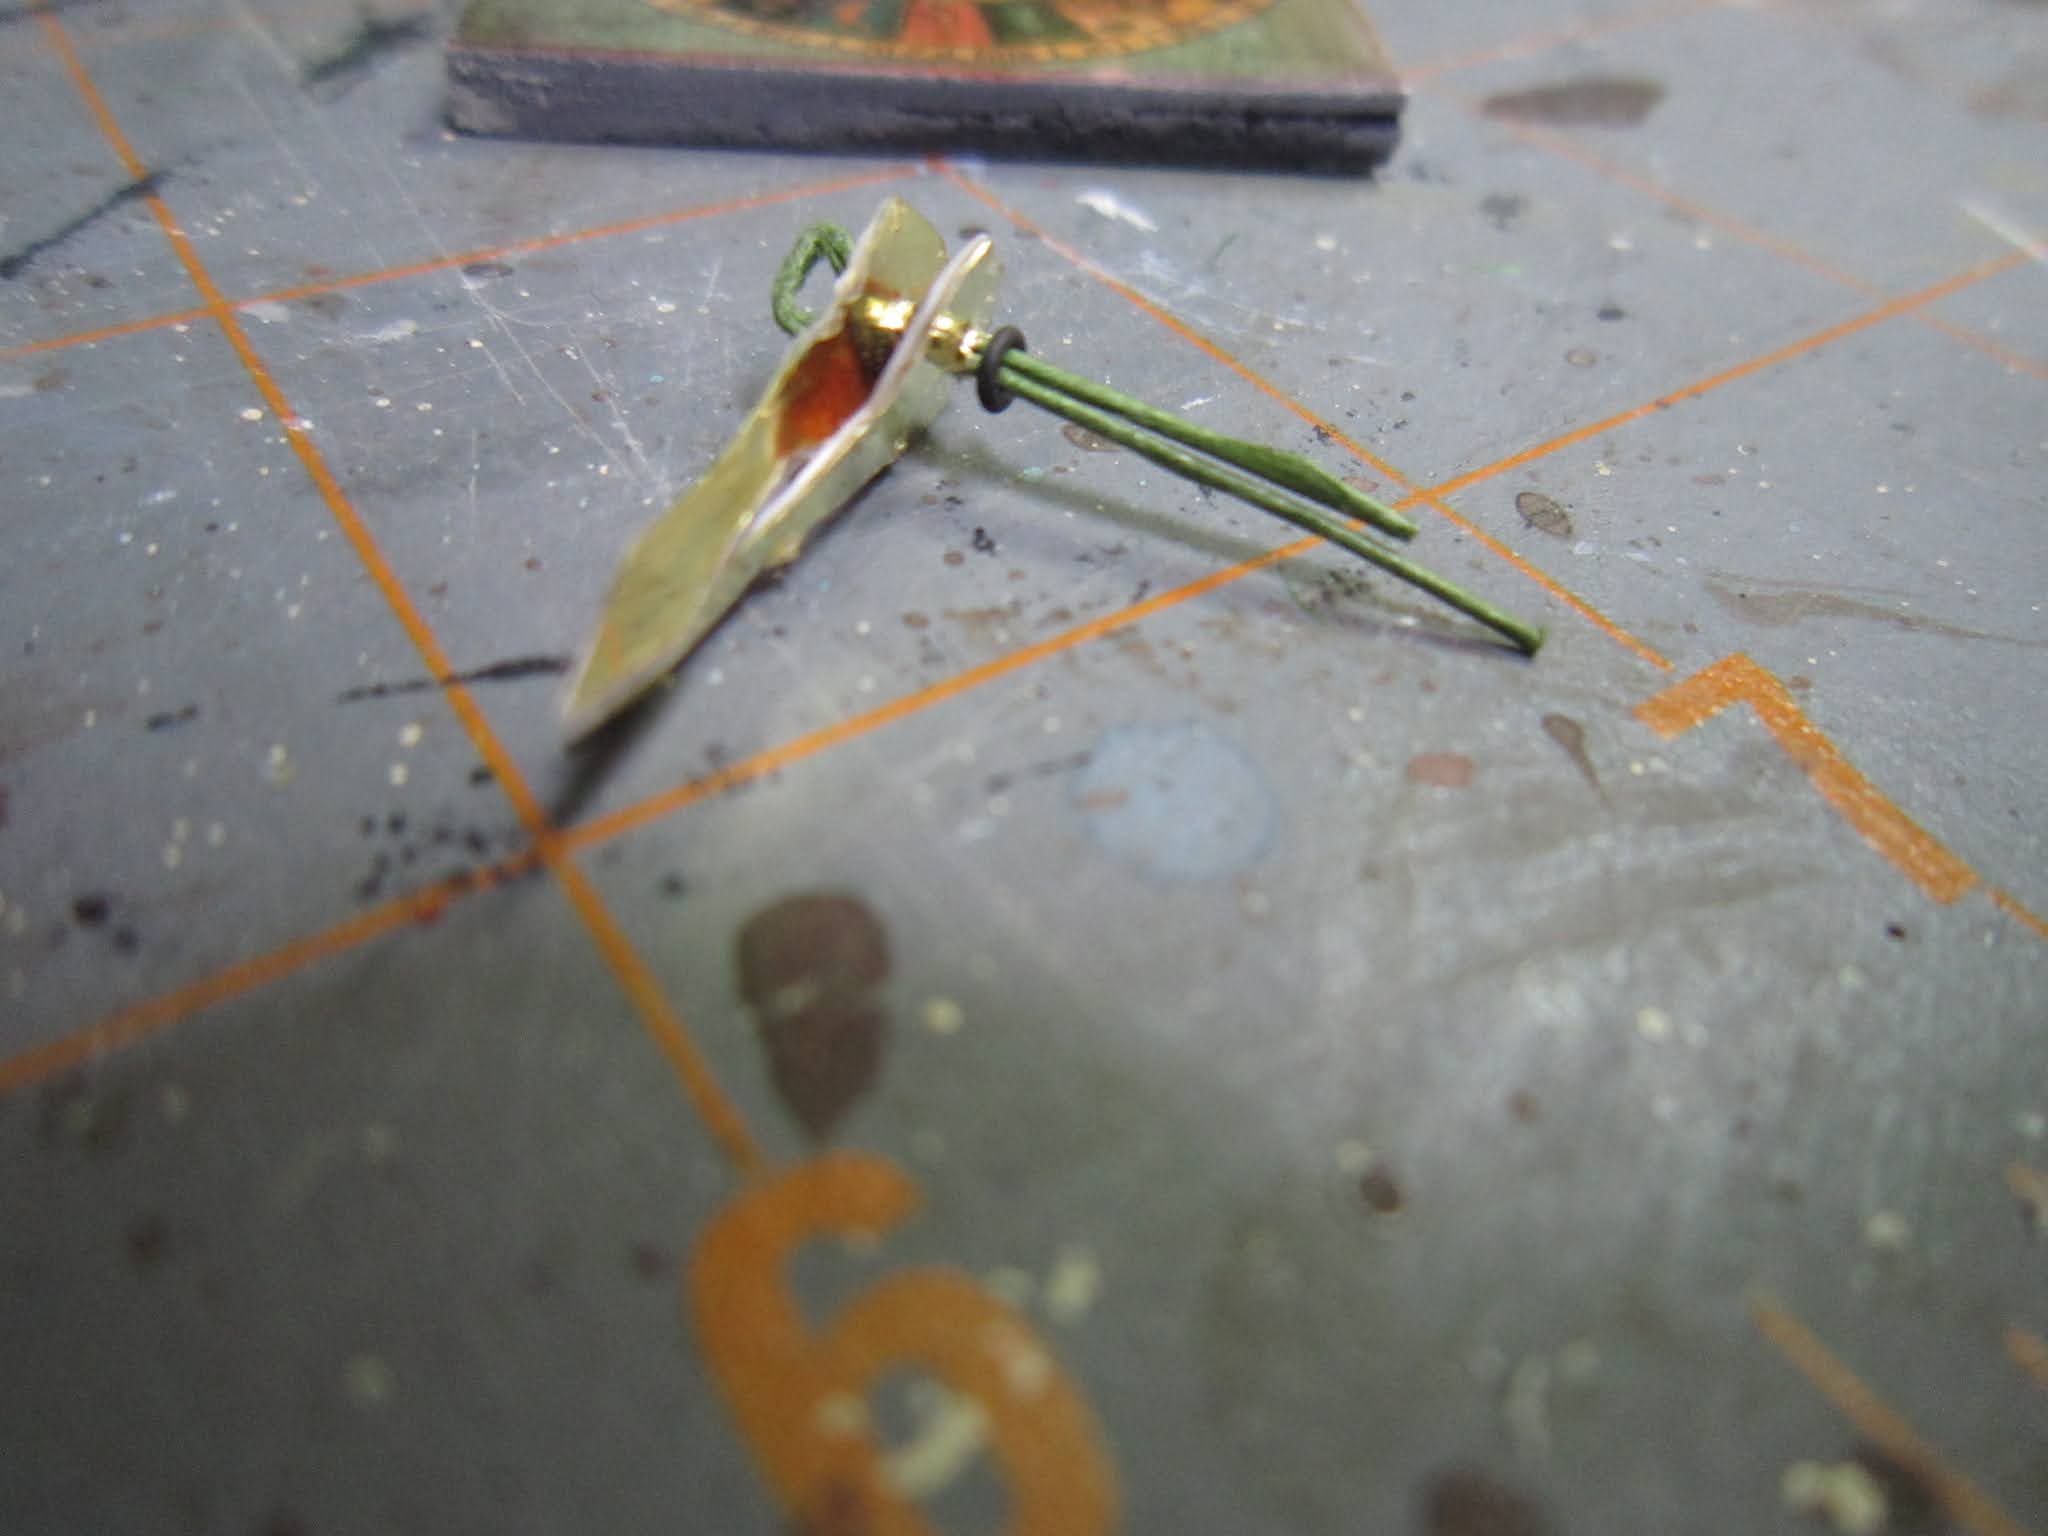
Next up was the door handle.  I bought door handles (two) because I had no intention of adding actual handles to the back doors - although I may change my mind later. Also, thinking how doors usually work, I really only needed one on the outside and one on the inside of the working entrance door.  The left door is what would swing open - not the right.  As a shop, they could prop open the right door during business hours but the entrance is really just on the one side. Or it is for now. Anyway, the doorknobs did not come with screws (grrr) so I had to steal 4 screws from a tiny hinge kit.  They of course were super difficult to pick up and put into the respective holes but I eventually got the front door knob on.  I dug out a little more wood for where the key would go (which will be on the inside only) and fixed the knob and screws with a drop of glue here and there.  I then decided to glue the other two screws onto the door knob plate thinking it would be easier to just tap them into the wood on the back of the door to fix them in place. It would have been had I not forgotten to mark the holes on the back of the door.  Ok, pulled them out and tried again. The key won’t fit right now since I need to dig out a little more wood but they look good! They are just propped in place as I still have so much more painting to do - but I did put them in a zip lock bag in case the knobs come away and the screws come out - I’ll never be able to find them again if I didn’t.

Doors propped into their frames

Well, sorry for the long entry - to make it up to you, check out this room fragrance Cedrato di Firenze made by Wally Cosmetici - its inspiration being the Bizzarria Lemon of course !! It is the most wonderful fragrance spray especially in the kitchen. Check out their site and hopefully you can find it close to home -

“Bizzarria”, chimera, legend and love spell

Introduced in the citrus fruit collection of the Medici Gardens, it comes from the

countryside of Pietrasanta (Lu).

Cedrato di Firenze is the most fragrant and sweet of all lemons

"For its grateful smell superior to all the others”- Wally Cosmetici, Montemurlo (PO) Italy

Tuesday, April 20, 2021

Miniaturitalia 2021

April 20th 2021

As I had mentioned before, recently there was Miniaturitalia this year which was held on line only.  I have gone to this fair in the past when I needed objects for my Japanese Ryokan project so some of the artisans I already knew.  But being on line, I was able to set up an appointment with one or two to meet them and chat exclusively - something that was impossible during the normal show - and then make purchases.  So, here are some of the purchases I made:

Lilliput’s Treasures who has an Etsy shop. Lots of interesting odd and ends. I found a ouija board and a miniature jar of lemon jam. There were other things of the lemony nature but they were not available when I made the purchases - so will have to check back soon. Yes, some of these objects are available all over or from sites out of Asia but this shop is in Italy and I really wanted to give some biz to local people.

I then bought some objects from ELISACREAZIONIMINI. She had some breads and sandwiches that I liked plus a cheese board. Yes, I know, I could probably make these and I probably will try in the future but having some already made bakery products was easier right now.  The cheese board is basic and will need to be pimped a little but I am glad the cheese pieces are not glued in place meaning I can do what I want with the presentation or use them in a charcuterie board or something.  I like the rosette sandwiches - very typical Italian sandwich.

One of my favorite mini artists is Oiseau deNim Miniatures - Peiwen.  She is an expat (from Taiwan I believe) living in France.  She is very talented! Her pieces are unique and very well executed.  I bought a few stainless steel modeling tools from her as I am hoping to try out modeling in polymer clays at some point. But her rendering of objects like labeled tea tins or a plate of French foie gras is mind blowing. (Check out her baskets of sliced bread!)I had contacted her as I knew she did orchids in the past but right now she is concentrating on framed antique paintings. She sells all kinds of molds and stamps for making your own plants or even light bulbs. Just a super shop. I will come back to her when I need something particular.

The other artisan that I had to buy from was Elisabeth Causeret (she doesn’t even have an Etsy shop!) but she did provide a link to the items she sells so I was able to check out all the pages of her brochure and order what I needed.  She makes seriously the tiniest ceramics on the face of the earth. A few years ago I bought cracklè pieces that were so refined. I do not think I have ever seen anyone that produces objects this small.  Her prices are more than reasonable given the detail (see below the teapot, teacups etc.) She works in stoneware, porcelain and red clay as well. Stunning! She is French and since I speak no French and she speaks no English or Italian it’s always fun buying from her. But she is an exquisite lady and her objects will become heirlooms.

I did end up making other purchases but not from people who showed at the fair. There were obviously fewer exhibitors than usual since I think a lot of artisans were not sure how this would work out.  It’s the first time they’ve done it here. I think it was very successful.  I believe they thought so too because they extended it into the week after it was supposed to officially close.  So even with the virus, at least these mini business people are still working.

Miniaturitalia 2021 purchases

Elisabeth Causeret miniatures

So, let’s end this post with a recipe - lemon curd. Yum.


Monday, April 19, 2021

Nobilissimo Gioco della Mea

Nobilissimo Gioco della Mea - Villa Petraia Florence
15th - 19th April 2021

While I was printing off the little tile images, I came across another image I wanted to use. I had gone to Villa Petraia years ago and in the games room I found a board game hanging on the wall.  It is called the "Nobilissimo Gioco della Mea". Basically it has a spinner and each player is supposed to place their bets on one of the figures or symbols and spin. I couldn’t find the exact way it was played but I found it in a list of games that are played even today during parties in Venice organized by a tourist agency and calling the events “Casanova’s Casino Games”.  So, since I will have a board games cabinet, I wanted to hang up a mini version of this game.  Of course, when I took the picture I did not take any notes about the actual game - to understand if it was a functional board game or just a picture of a board game with spinning indicators. But from the picture I took, it looks like there are actual spinners.  So now what. 

The only thing I could do was to pull out all the bits of hardware I have come across or own to fabricate the spinners. I am a broken bits hoarder and have an actual small lid I flipped over to create a container of bits and bobs as I come across them.  Not only, I have small jars in my tool trolly for electrical bits and even mechanical crap - lots from when I built a PC years ago with a friend - and even a watch that I had picked apart.  And that is where I found some of the pieces that could be used to make the spinner.  Course I didn’t have the actual watch hands (they are in the Japanese Dollshouse foyer) so in the end, I printed the spinners on photographic paper which is thicker (even if the colors became quite washed out which was disappointing) and glued them to the piece of lamina and decided to let them set overnite.

Spinners glued to the brass lamina
Anyway, days went by when I couldn’t get upstairs to dedicate some time to playing with things but it gave me time to contemplate how I wanted to make the board game. I wanted the back to be some kind of semi-rigid metal so I decided to cut out a piece of brass lamina and use that as the back. After slitting my hands on the lamina a few times, I finally managed a small plaque and wanted to age it. That didn’t go well.  The only aging methods I found online were for steel type metal and not for brass lamina so nothing worked. I set out, again, to find what others have done to age or rust surfaces. I came across a great one which I will have to try and adopt for molding and aging the brickwork too but what I brought away from all the research was that I could easily simulate the rust on the back of the plaque using normal acrylic paints and a bit of crumbled mortar granules.  So that is what I manged to do - successfully I think!

The lamina after trying the failed chemical treat so resorting to paint

Finished back of the brass lamina after painting.

Next was to find a piece of wood to form a base between the game board and the lamina. I figured I was going to need a way to support the spinners so a soft backing board (balsa wood) to peg the spinners and then attach the rusty back lamina sheet would work well.  I cut a small piece, painted it a dark grey and then proceeded to cut out the spinner arrows. The paper did not glue up entirely to the metal but I was able to cut the spinners out even if they are very approximate. In the end I went with a very fine gauge floral wire as the anchor of the spinners and tiny loops I had on hand as washers - so that the spinners would at least move around even if they won’t spin entirely. I managed to thread everything through (after dropping things many times) and put a drop of glue on the back to hold it together.  I let that dry and then attached the "rusty" metal lamina to the back (using a different kind of glue to insure that it won’t come unattached) and aged the sides and spinners a bit. I must say, I like it. I think it will look good in the games cabinet.

Threading the spinners and "washers". Super tiny!

Finished game board, with working spinners

Rusty back of the game board

Cave Canem (still slightly wet)
To finish off this little project, I made a tile with the “Cave Canem” from Pompeii as a sort of “Beware of Dog” sign for the Orangery. I attached a small hanger so I can place it in the door when the time comes.  He’s not exactly the same as the Roman dog but a nice modern version that was created back in 1955 by Creazioni Luciano I guess. Here is a link to buy one if you like it!


(I have no affiliation with anyone or any site for the images or tiles - I just am linking to give merit to who the artisans were or are.)
 

Painting and Playing

12th April - 15th April 2021

Starting painting the exterior


So, getting back to my mini project, I started looking into methods of aging the bricks and got side tracked. I will need to paint both inside and out of each panel so I started to think about the interior decoration while doing that. I am planning to use the typical Tuscan and even Amalfi style of tiling on the inside. Yes, it’s true, most of these limonaia never really had tiling from top to bottom but I am going to put some mural tiles on the inside of each section under the windows.  Also here I will need to age these a bit but I needed at least to start off by finding some images to use.  So after digging around on the internet, I managed to find some and adjusted the dimensions somewhat to fit my needs. First was to print them out in black and white on the normal printer to check sizing etc. Then I print them out on my color printer, again on normal paper.  I like the colors very much! So bright!
Sizing and placement tests
Years ago I had bought some little ugly 2cm by 2cm glass mosaic tiles at a craft store. They were cheap and crappy quality but I plan on covering them with little citrus images and tile designs. I was going to use these in the spaces under the windows but the sizes do not match up and since they are glass and not acrylic, I needed to make some tests on cutting them to size.
 
First little tile done.
So, in the meantime, I screwed around with putting an image on one anyway, just to test it out.  I glued it on with watered down Vinavil glue (no such thing as Modge Podge here in Italy), then a little on the outside being careful not to apply too much to avoid smudging the inkjet image. Once it was dry, I varnished up the outside. I made it pretty thick so that the tile didn’t have a super even surface or streaks.  I think it came out great! Now just have to fool around with trying to cut them just to see if I can and be able to use them elsewhere in the tea room. (I found this image off a vendor on Amazon)


In my searches on the net I came across another person writing about lemons and Florentine lemons, just a small excerpt but nice none the less.  The blog has lots of info! Check it out!


Friday, April 9, 2021

Finishing the Brickwork

5th April - 9th April 2021

After Easter, I went back to finish the brickwork.  The templates were more solid and allowed me to finish up the mortaring and allow things to dry.  It took quite a while to get thru all six panels but the final result was satisfying. The only problem was that the templates were perfect for getting the mortar in between the bricks but lousy in getting the space between the bricks and the wooden facing.  I had millimeter gaps on each side of the brick panels. So, I mulled it over and came up with a solution of using a sac à poche - you know, those pastry bags used to apply frosting or cream - and I created one with a zip-loc bag.   

Panels bricked and drying.
The unsightly gaps that needed filling.


I made some mortar mix and filled the bag then cut a small hole cut at the bottom. I was able to squeeze out what I needed to fill in the spaces that were the most unattractive.  I used my Exacto knife to shove the mix in the gaps and a T-pin to flatten out the mortar and pack it in.  It worked like a charm!

Filling the Zip-loc bag with mortar.
Stuffing the mortar in.


The little T-pin to pack mortar in the gaps.
I left the mortar again to dry and went back the next day to sand down any areas that were not to my liking.  I used a face mask during all of this work since the warning label on the mortar mix was sufficiently nasty. 


Thank god that right now I had an extra KN95 mask in my house (due to all this virus stuff - our city has supplied us with many masks including a few of these. Since I’m still furloughed, I have been using my own home made masks to go out on dog walking or grocery shopping. I was saving these KN95 ones for up close contacts in a work environment. So, I am using one for this work today.) After sanding things down, I sponged everything again and let things dry. Next day I came up and used a soft cloth to dust the bricks down and improve the overall surface removing the streaks left from the damp sponging the day before. Still needed a mask to do this work too. I scraped back some of the mortar that was applied too far over some of the brickwork - then dusted and cleaned my work space for the next phase -
Cleaned up and ready for ageing.
To age and give the brickwork some character.
First though, I’ll need to do some research into methods…. in the meantime I got my first vaccine! Hoorah! Bout time. Oh, well, Italians are not known for their logistical skills. Still, they do try.

Friday, April 2, 2021

Back to the Brick laying...

March 24 2021 - 2nd April 2021

Well, with me being furloughed and all, I have taken back up the Orangery project.  Lots of time and events have passed since my last posting from August 2019.  I have yet to be able to return to see my Dad in America since that last post. Who would have thought that we would ever be blocked by a virus and inhibited from doing any traveling.  And here we are nearly a year and a half later and still stuck at home.

Lots has hppened over that time - not all of it good - but I have learned to make bread at home (yes, a bit clichéd at this point but when life gives you lemons -but I do make a really good kick ass schiacciata now!), finished three cross stitch projects, rekindled my love for opera (thanks to many streamed performances by the Met in NY), finally found a part time job closer to home so quit my full time job only to be then unceremoniously dismissed after not even six months (due to the market collapse in textiles here in Italy) leaving me in limbo - neither employed nor unemployed as it is illegal right now to fire people in Italy - and with no income per se, have a MS flare up after nine years of nearly nil health events and losing the use of my right eye (but it's nearly back to normal now - just wasn’t fun having to find treatment in the middle of a pandemic), and, finally, taking some exercise by walking much more than I have in years. I figured I’m not getting any younger, I’m just getting fatter (all that good food, wine and bread) and need to start thinking at least for my heart health.  So, maybe I can make 2021 better for me - but I do have a feeling I’m going to have to beat 2021 into submission - it hasn’t honestly started out that great and I do not intend to pass another year like 2020.  Not without a fight anyway.

So, getting back to my Tea Room, I found the walls that I had started the brick work on.  I was regretting having decided to use this project to learn how to do brickwork since the bricks do not in fact lay flush to the building (and I had also seen a very effective use of the embossed sheets of brickwork on another project that was quite convincing and infinitely easier) but I worked today on making some templates to help keep the mortar mix from oozing everywhere. (I also worked with a dremel bit to see if I could clean up the edges of where mortar was not quite clean and it worked fine - so mistakes are reversible.) Given that, I will stick with these bricks for now. Although I did purchase a sheet just in case - and I do like it too.  But seems way to flat - not 3D enough - so I’m sure I can use it in another part of the build (thinking the edges of the orangery platform for example).

Working on the small template for the mortar

So, after the Miniaturitalia show (which was held on line this year end March) and me making way too many purchases (I will dedicate a post to those as soon as they all arrive as well as my review of the show - for me very positive) I finally got around to tackling the brickwork on the remaining panels. In one afternoon, I managed to mortar up three small and two large sections.  The mortar is still a bit tricky but after applying the mix to the panels and scraping and sponging them down before they dry solid, they looked fairly good.  The small template did not hold up to the humidity (amount of water using during the mortaring phase) so it required some reinforcing. I added some masking tape, gave it a layer of glue and then gave both templates a coat of varnish. Hopefully that will stop the damp from eating away at the wood junctures.

smoothing and squishing in the mortar

scraping back the excess

The next day, the brickwork was dry enough to be cleaned up a bit. Clearly it is quite dirty and with a grey patina. I don’t really mind it since I plan on giving all the brickwork an aged look - even with a greenish hue where mold or plants are starting to grow over the brickwork.  I had even thought about covering them at the bottom with ivy or something but will have to wait and see. So, while the templates are drying, I figured I’d write out a quick post to show you that I am getting back into the project.  It still feels daunting as all new projects do when you’re winging it. But hey, that’s where the fun lies in it.

The panel on the right was from the first brick laying, the central one from last night.