August 9 - 15th 2021
Continuing with the UV gel plate tests and have had quite a few failures.
First thing was to try and find some cheap semi-permanent nail polish that hardens with UV light. I did find some white paste like gel at the dollar store (altho it cost €8.79 euro for 30ml - not a dollar) and still needed to be mixed with the clear gel I bought specifically for this (10ml for €9.00) so that product is not quite the right thing, but the plate test did come out a bit better. So my next test involved using some nail polish that I found at the local mall. I bought some white polish and made a plate from it no problem. Didn’t even need to add any of the UV clear gel. It hardened under the UV lamp in under two minutes. Next was to try and add in the design.
First thing I lost around two days installing a new printer. I had to test the printer to be sure I could install it on my Mac (which is pretty full) and that went no problem. Then I had to find some ink jet cartridges for it. My old printer works fine (even nicer than this one) but the HP cartridges are hard to find now (not making them anymore) and at €49 for two, the newer printer and it’s cheaper cartridges (€34 for two) makes it a better choice. I am not a huge printer of things but when I print out mostly for my mini stuff I need the color printer. So I’m hoping these will last me a few months at least. After having removed and re-boxed the old one, I printed off the labels on normal paper high dpi on the new one and they’re good enough since I will be applying other medium on top of them and they will lose a lot of details anyway. I attempted to use a new clear UV gel sandwiching the plate design between that and the white nail polish but when you squish the plate mold the white overflows into the design in front. Not only, seems that this gel is really only good for adhering the semi-permanent polish to fingernails and not as an outer layer. So will have to continue to use the pure white nail polish to make the plates and find another way to add the designs. First fail.
 |
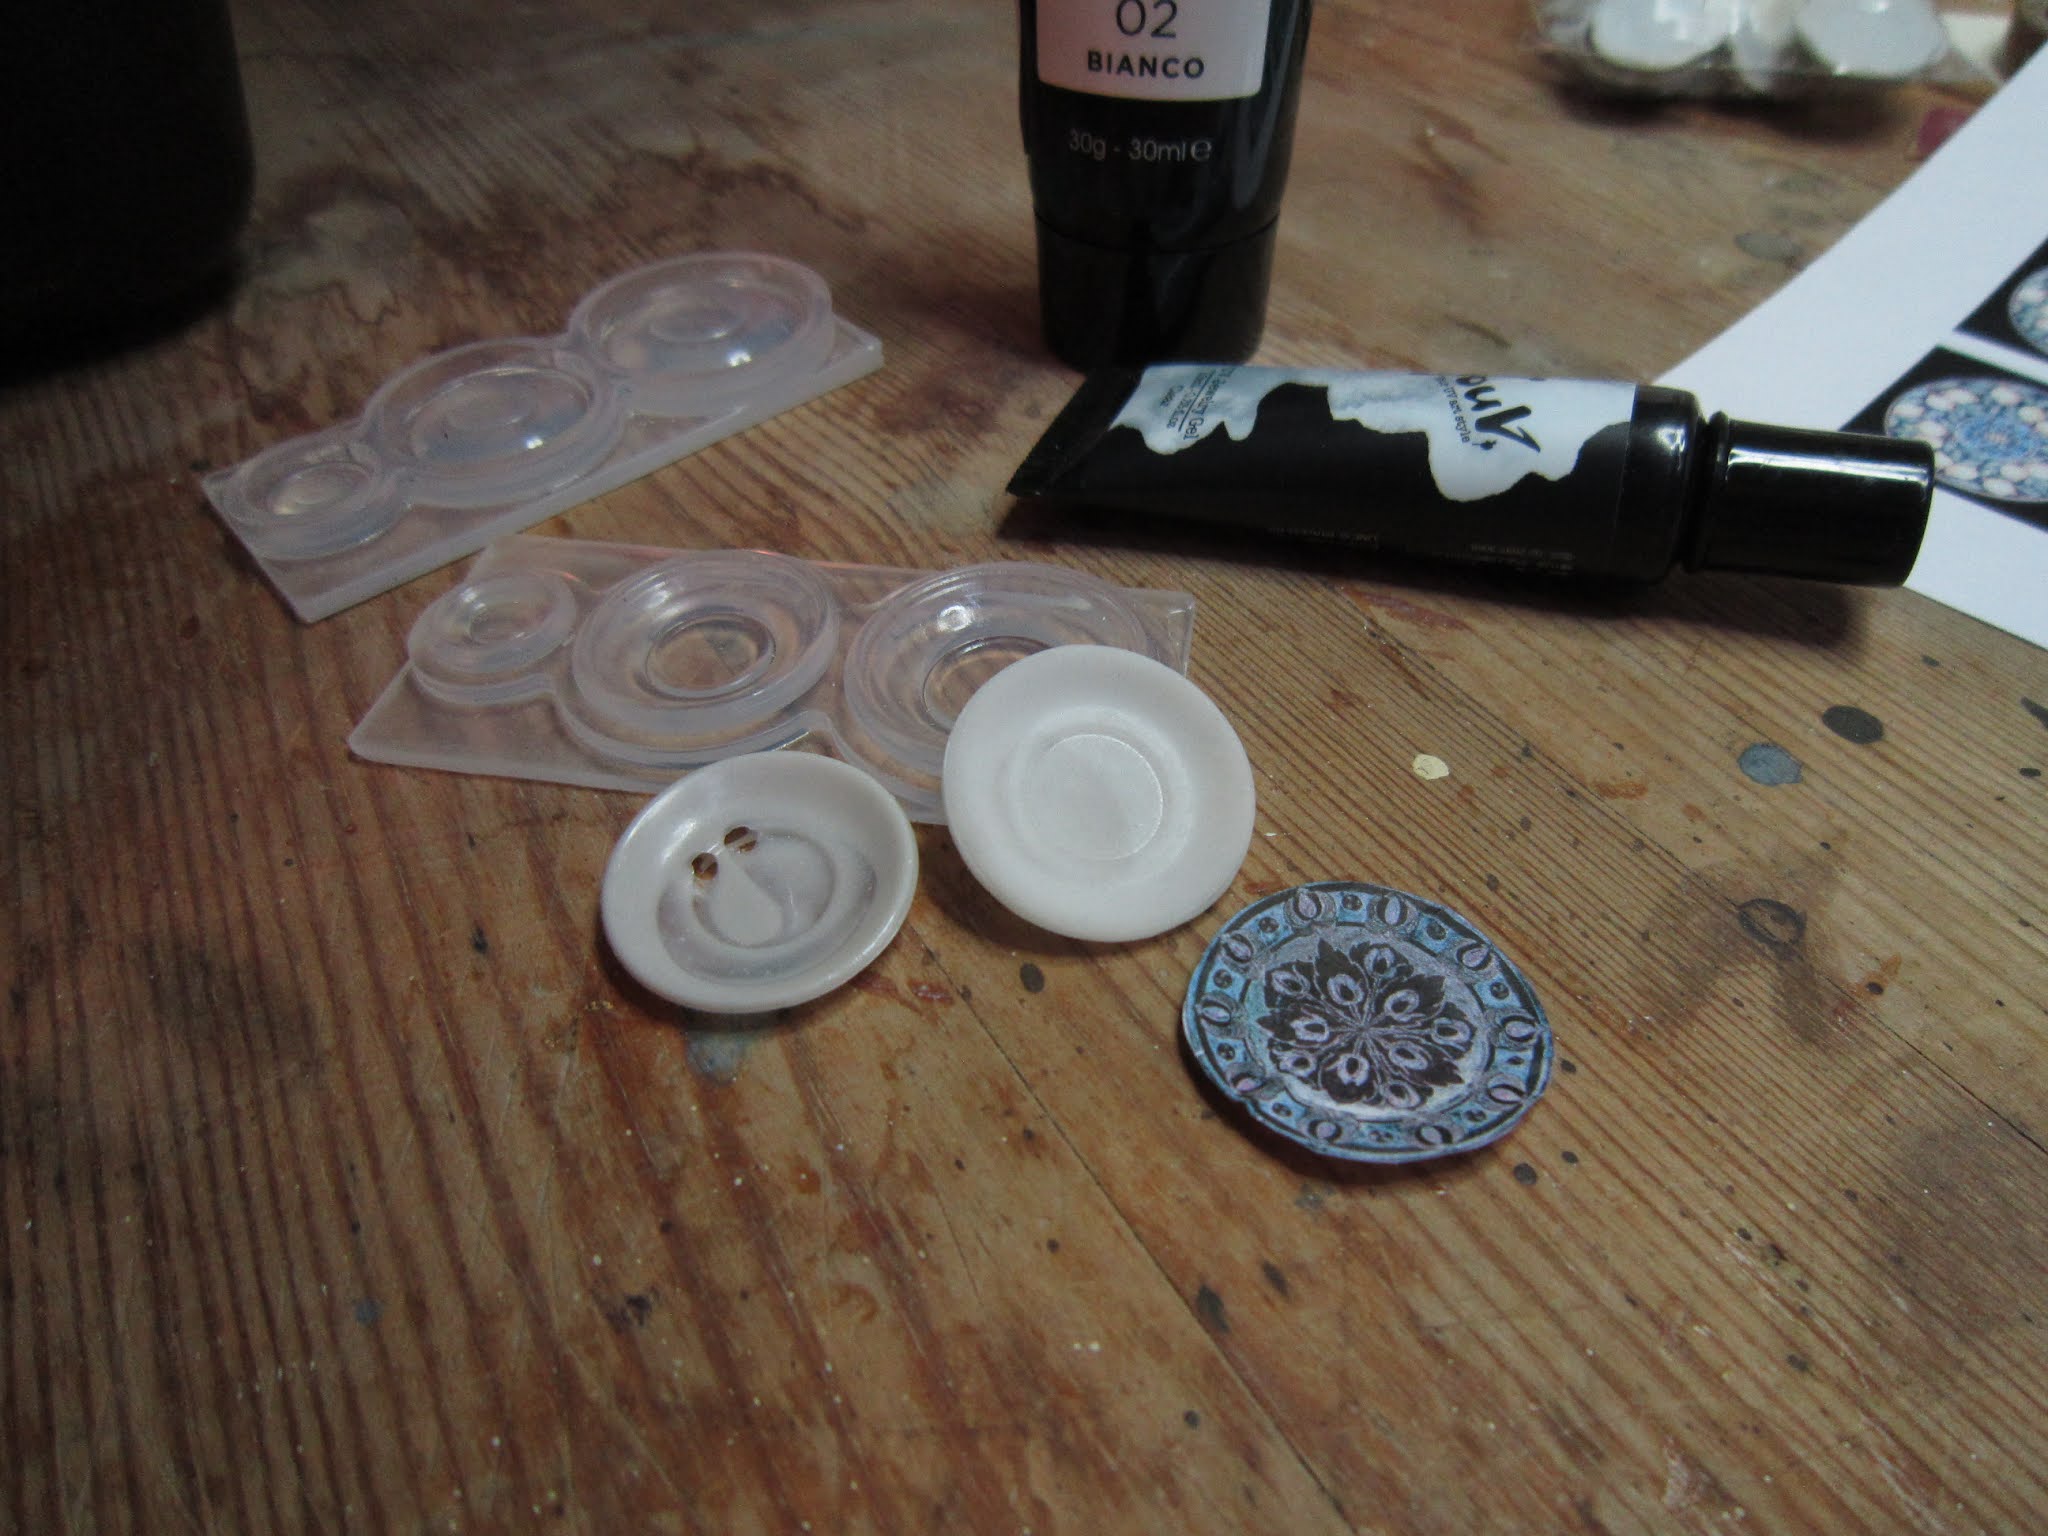
You can see the difference from plate one to the mixed medium plate. Better but not perfect.
|
 |
Trying sizing on the design into the silicone plate mold.
|
 |
How the design would eventually fit in.
|
 |
Full white nail polish result from the mold.
|
 |
Result after hardening - the white invaded the top side of the plate - so, not acceptable.
|
In the meantime, I wanted to also run a test in adding color to the white nail polish. I used a green chalk pastel to the white but also this was a failure. The ratio of powder to liquid makes the nail polish too diluted to harden sufficiently. I ended up re-enforcing the underside with the specific gel I bought for the silicone molds and coaxing the plates out of the mold. Even after many minutes under the UV lamp, the plates just weren’t hardening sufficiently, so I added a little to the top too. I don’t think these green ones are salvageable - no matter how much I add on top the inside is still not cured (even after leaving over night and back under the UV lamp the next day). Fail two.
 |
Mixing the green pastel chalk...
|
 |
...under the UV light for hardening....
|
 |
| Nada, this was a throw away trial. |
I figured the problem was the thickness of the actual liquid in the mold. If I put too much polish in the then it cannot harden thru - especially when I’ve corrupted it with pastel. To test this, I filled a mini croissant mold to see if the polish would harden thru. I put it under the light for around 3 minutes and it did come out ok - seemed hardened thru. But I tried to sand and shape a bit a bigger one and it cracked and gel oozed out. Not hard enough all the way thru. Back under the lamp till they harden up. It was just a test anyway since these molds are actually for use with Fimo type clay, not really with the UV gel. So, thickness makes the difference. Pseudo fail.
 |
Croissant mold test....
|
 |
...after curing but still not solid all the way thru.
|
The next test was using acrylic paint to color the white nail polish instead of chalk. So I added some yellow acrylic paint and two drops of the UV super gel then used a paint brush to dose out the amount of product in the mold. It took a few tries to fill it sufficiently. When you squeeze the mold it fills areas too so once it seems covered I stuck the plate under the lamp. I eased it out of the mold on one side, under the lamp again then eased it out the other. Success! The trick is the acrylic paint. Seems it doesn’t inhibit the hardening of the gel. But still, once I started to sand down the plate I found areas where the gel was not hardened completely. So still, not the best solution.
 |
Filling the mold with colored gel polish....
|
 |
...result after sufficient hardening.
|
 |
The learning curve. From first to last plate.
|
Lessons learned so far? If I want intense colored plates, I’ll have to paint them after making them. It’s way too much work and waste of the product to mix the white polish, acrylic paint and drops of the super UV gel. It’ll be faster if I make all the plates white and apply the designs onto them. The whole point of making these plates from a mold is because I was not able to find white ones that are this thin and delicate looking. So I think I am on the right track! Next step - finding a way to make my own decals to transfer the Amalfi type designs onto the plates… we will see how that works out…..


No comments:
Post a Comment